Configuring and starting an identification flow
To start an identification flow, you need to create an AutomatIdIdentificationRequest first, configured according to your needs.
- Android
- iOS
val identificationRequest = AutomatIdIdentificationRequest.Builder()
AutomatIDRequest* request = [AutomatIDRequest requestWithDocumentTypes:docTypes];
Selecting the document types
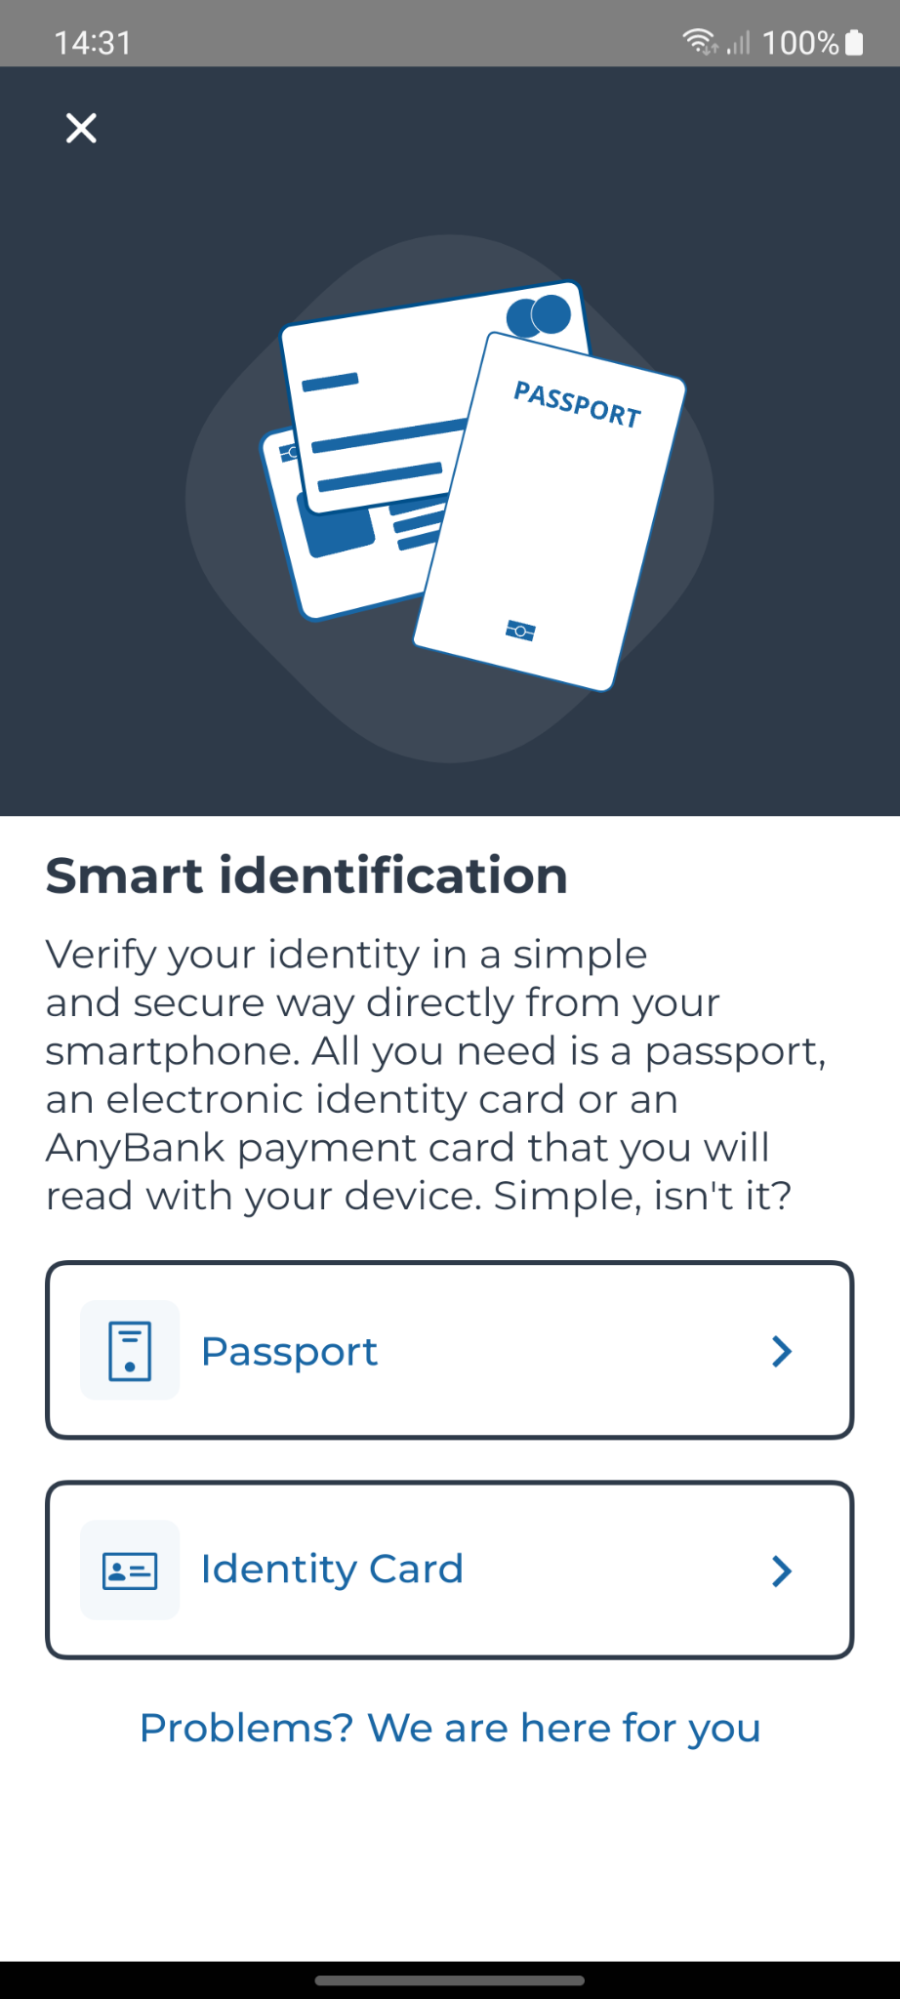
First of all, you must specify which document types you want to allow to be used. You can choose any combination of the following:
- Electronic Passport, compliant to ICAO 9303 standard
- European Electronic Identity Card
- (Android only) Payment card
You must provide at least one document type.
- Android
- iOS
identificationRequest.withDocumentTypes(setOf(
  AutomatIdDocumentType.IDENTITY_CARD,
  AutomatIdDocumentType.PASSPORT
))
NSMutableArray<AutomatIDDocumentType*>* docTypes = @[AutomatIDDocumentType.identityCard, AutomatIDDocumentType.passport];
Payment card (Android only)
The payment card verification allows you to verify that the user is in physical possession of a specific payment (credit/debit) card.
To use the payment card verification feature, since you will be dealing with payment card data, you (more precisely, the entity that will publish the app on the store) must either:
- be the issuer of the payment cards that will be read
- be PCI-DSS certified
To do so, you will need to generate an encrypted JWT token, typically on your backend, containing the card data of the card that you expect the user to possess. AutomatID will ask the user to read that card through NFC with their smartphone, and it will cryptographically verify that the read card data match the card data provided in the JWT. The JWT must be encrypted with the public key for the payment card verification feature that you downloaded or provided during the project setup step.
The JWT header must have the following fields with the following values:
cty:JWTenc:A256GCMalg:RSA-OAEP-256
The JWT payload must have the following fields:
iat(issueTime): numericexp(expiration): numeric, expiration should be ten minutes after the creation datecustomer_identifier: string, this data is available on the AutomatID Portalinternal_application_id: string, this data is available on the AutomatID Portalidentification_id: string, this data is an UUID that identify each identification requestedpan(card number): string, no spacesexpiry_year: string, format “yy” (for example, "24" for 2024)expiry_month: string, format “mm” (for example, "01" for January)
An example is:
Header:
{"cty":"JWT","enc":"A256GCM","alg":"RSA-OAEP-256"}
Payload (before encryption):
{
  "iat": 1666344004,
  "exp": 1666344604,
  "customer_identifier": "70268ec2-a8ea-4fa4-a609-76cfce2790e2",
  "internal_application_id": "0f1d8133-e280-4160-9cfb-2aa59f4a7060",
  "identification_id": "d62167a3-bd81-41b2-a5ad-179d83f3cc89",
  "pan": "4111111111111111",
  "expiry_month": "04",
  "expiry_year": "23"
}
Here follows an example of JWT generation in Java leveraging the nimbus-jose-jwt library:
// Create JWT
DateTime now = DateTime.now();
JWTClaimsSet jwtClaimsSet = new JWTClaimsSet.Builder()
  .issueTime(now.toDate())
  .expirationTime(now.plusMinutes(10).toDate())
  .claim("customer_identifier", CUSTOMER_IDENTIFIER)
  .claim("internal_application_id", APPLICATION_ID)
  .claim("identification_id", IDENTIFICATION_ID)
  .claim("pan", CARD_NUMBER)
  .claim("expiry_year", EXPIRY_YEAR)
  .claim("expiry_month", EXPIRY_MONTH)
  .build();

// Encrypt the JWT
JWEObject jweObject = new JWEObject(
  new JWEHeader.Builder(JWEAlgorithm.RSA_OAEP_256, EncryptionMethod.A256GCM)
    .contentType("JWT")
    .build(),
  new Payload(jwtClaimsSet.toJSONObject()));
jweObject.encrypt(new RSAEncrypter((RSAPublicKey) jwtCipherPublicKey));

String generatedJWT = jweObject.serialize();
Once your app has obtained the JWT from your backend, set it to the identificationRequest:
identificationRequest.withCardScanInput(AutomatIdCardScanInput("... the JWT …"))
Fallback button
You can also choose to show a "user fallback button", that will be shown in the first screen of an AutomatID identification flow.
You can use this button to perform a custom action, such as calling a call center. You can customize the text that is used (see Localization).
The button will be shown in the first screen of the identification flow. In the following example, it is the "Problems? We are here for you" link.
To enable the fallback button, do the following:
- Android
- iOS
identificationRequest.withShowFallbackButton(true)
configuration.showFallbackButton = YES;
When tapped, AutomatID will close and you will receive the USER_TAPPED_FALLBACK_BUTTON error code in the error callback (see Managing errors).
Photo processing mode
By default, AutomatID extracts the photo from the document by reading it from the NFC records, and challenges the user to perform a liveness check, to ensure that the user performing the identification is indeed the one depicted in the document photo. This behavior can be controlled via the following method, by passing one of the values below:
- Android
- iOS
identificationRequest.withPhotoProcessingMode(PhotoProcessingMode.READ_NFC_PHOTO_AND_PERFORM_LIVENESS)
request.mode = AutomatIDPhotoProcessingMode_READ_NFC_PHOTO_AND_PERFORM_LIVENESS_CHECK;
READ_NFC_PHOTO_AND_PERFORM_LIVENESS(default): the user photo will be read from the NFC records and shown to the user, and a liveness check will be performedREAD_NFC_PHOTO: the user photo will be read from the NFC records and shown to the user, but no liveness check will be performedDISABLED: the user photo will not be read from the NFC records, and no liveness check will be performed
Locale override
By default, AutomatID tries to use a locale matching the application one, or falls back to English. If you want to specify the locale to use, use the following method. Please note that if you use a locale for which a translation is not embedded in AutomatID, or for which you didn't provide your custom translations, English will be used as a fallback.
- Android
- iOS
identificationRequest.withLocale(Locale("it", "IT"))
request.locale = locale;
Use secure window (Android only)
By default, the activity managed by AutomatID has the FLAG_SECURE flag set. This will prevent screenshots of AutomatID flows. If you want to disable this flag (for example, for testing builds of your app), you can use the following method:
identificationRequest.withSecureWindow(false)
Start
To start the identification flow, call the following method:
- Android
- iOS
AutomatIdManager.startIdentification(context, identificationRequest.build(), object : AutomatIdCallback {
  //...
}
[AutomatIDManager startIdentificationWithRequest:request andCompletion:callback];